dimanche 31 décembre 2017

Bonne Année 2018 Best Wishes


Merci à tous pour vos visites et commentaires sur ce blog.
Tous mes voeux pour cette nouvelle année, qu'elle vous apporte bonheur et inspiration !


Thank you for your support on this blog.
I wish you lots of happiness and inspiration for this new year ! 


dimanche 17 décembre 2017

Bonnet Toph de la série Elemental / Toph wolly hat

Je me suis dernièrement lancé un défi : apprendre les rangs raccourcis à l'allemande, le montage provisoire avec un crochet et tricoter enfin un des bonnet de la fameuse Wollywormhead, qui se dit "architecte en chapeau". Je me suis donc lancée dans la série Elemental avec le fameux Toph qui correspondait si bien à ma laine la malabrigo sock. Les explications en anglais sont très claires et les diagrammes super simples à suivre mais j'avais oublié que j'ai tendance à tricoter une peu large.


I recently challenged myself to try to learn german short rows, provisional cast-on and to knit one of the hats of the famous Wollywormhead, so I chose the Elemental and the beautiful Toph that corresponded so well to my malabrigo sock yarn. The explanations are really easy to understand and the diagram is really simple to follow. But I had forgotten that I knit a little to loose so my hat is a little too big and some of the flammes sometimes stand out but it is really soft to wear.


Mon bonnet est un peu grand et mes flammes font parfois quelques bosses mais dans l'ensemble le résultat est pas mal...


et la texture du tricot est super souple...

Il me reste encore quelques autres modèles à tester pour améliorer la régularité de la tension dans mes rangs raccourcis....
I still have the other hats of the series to improve the tension of my knitting ....


Bon tricot à tous !
Happy knitting to all ! 


dimanche 3 décembre 2017

Log cabin barn-raising ..finished !

 J'ai terminé la partie cousue à la main et je cogite sur la future bordure qui sera probablement noire et rouge...
Dommage que la météo ne mette pas plus en valeur les couleurs...

I have finished the handsewn top and I am thinking about the border that will probably be red and black...
It's a pity the weather is so grey...


N'hésitez pas à aller voir mon TUTO ici, c'est simple, c'est rapide et c'est du recyclage !!
Visit my Tutorial here, it's easy, quick and this is upcycling !!


mercredi 22 novembre 2017

Bonnet+château / Funyin in Azay-le-Rideau


KateDavies 's Funyin in front of Azay-le-Rideau's castle with a very grey weather !


 Récemment restauré, ce château de taille modeste mérite une visite (par beau temps c'est mieux).

This rather modest castle is worth the visit since it has just been renovated (it's even more beautiful under the sun)


pour le plaisir du détail....       to enjoy the details...


mercredi 15 novembre 2017

Echarpe crochet / Crochet scarf (free pattern inside)


Echarpe crochetée d'après un modèle d'un très vieux magazine de crochet en laine la Bien Aimée (mérinos single)
I used a crochet pattern from a very old magazine and yarn from la Bien Aimée (mérinos single)


Etant donné le prix de cette laine je peux vous dire que j'en ai utilisé chaque centimetre !
This yarn was rather expensive so I used every bit of it !


Voici le diagramme si vous voulez le tester ;-D
Here is the pattern if you want to give it a try ;-D

dimanche 12 novembre 2017

Memory blanket / "une couverture à souvenirs ?"

Cette semaine j'ai terminé le couverture commencée il y a un an et composée de carrés tricotés uniquement avec des restes de mes tricots de ces dernières années : en anglais ça s'appelle une "memory blanket" que l'on pourrait traduire par une "couverture à souvenirs" mais que certains appellent couverture Arlequin. Contrairement à ce qui se fait souvent j'ai choisi de tricoter les carrés séparés et de les assembler ensuite (c'est plus facile à transporter).

This week I finished the memory blanket I started one year ago using only leftovers from my knitting. I knitted the squares separately and sew them after because it was easier to take along in my knitting bag.


Pour faire mes carrés je monte 50 mailles que je tricote toujours au point mousse en faisant une diminution tous les rangs au milieu.
Quelques explications ICI et LA

I knitted squares of 50 stitches. You can find free patterns here


Pour la bordure au crochet j'ai fait trois rangs de mailles serrées avec de la soie de sari recyclée qui n'est pas très facile à travailler, puis une bordure finale avec 4 laines fines crochetées ensemble.

For the border I crocheted recycled sari silk which isn't very easy to work with and finished with a row of four thin sock yarns crocheted together.


Et voilà...:-D 


samedi 4 novembre 2017

Shoji by Norah Gaughan

J'ai tricoté ce modèle américain en laine française : la Bamboulène coloris Mastic de chez Cheval Blanc. La construction particulière de modèle m'a fait tricoter une bande de environ 2,30 mètres de long qui forme l'ensemble du pull. Plus de détails ICI

I knitted this American pattern with French wool : Bamboulène Mastic de chez Cheval Blanc. Its particular shape made me knit a 2.30 metres long strip which is then folded to make the cardigan. More details here

Ce gilet se porte de deux façons : soit avec le grand col vers le haut...

You can wear it two ways : first with the collar at the top....


soit on inverse haut et bas...
 or at the bottom...


Merci à la photographe !


Cela valait le coup de tricoter quelques 1,8 km de laine ! 
It was worth knitting those 1.8 km of wool !


dimanche 15 octobre 2017

Tuto patchwork : coudre à la main un carré log cabin vintage / Handsewing a vintage log cabin block

Avertissement : cette méthode ne conviendra pas aux personnes qui aiment la symétrie ;-D
Rien n'est mesuré précisément et l'objectif est justement d'obtenir un carré un peu irrégulier pour un effet vintage !
Warning : people who love and need precision won't like this technique because it is precisely made to get a vintage and shabby effect !


You will need : dark and light colored strips fabric of about 1.5 cm width, some sewing thread and a rather thin needle, a square of thin fabric on which you will sew the stripes that must be the size of  the block you want to make (so I'm recycling an old fabric and my block will be 15x15 cm) and a  small square of fabric that will be the center of the log cabin block.

Vous aurez besoin de bandes de tissus claires et foncées de environ 1.5 cm de large, du fil à coudre, une aiguille assez fine, un carré de tissu fin sur lequel vous allez coudre vos bandes de tissus au dimension du block que vous souhaitez faire (moi je recycle un vieux tissu et mon block mesure 15x15 cm) et une petit carré de tissus qui sera le centre de votre block.


Pin the square in the centre of the block (I will sew on the wrong side of the fabric so that the design won't show through the light-colored strips )

Epinglez le petit carré au centre de votre grand carré (je vais coudre sur l'envers de mon tissus pour que les motifs ne soient pas visibles a travers les bandes claires)


Place a light colored strip on the wrong side along the border and the right corner of the square.

Posez une bande de tissu clair à l'envers sur le carré central le long du coin supérieur droit et du bord supérieur


Start sewing little running stitches from the right hand corner of the little square ...

Commencez à coudre au point avant en partant du coin supérieur droit....


...to the left hand corner where you will make one or two back stitches to block the thread.

...jusqu'au coin supérieur gauche où vous ferez un ou deux point arrières pour bloquer le fil.


Cut the remaining bit of strip of fabric along the border of the square...

Coupez le reste de la bande de tissu le long du bord gauche du carré central...


...raise the strip you have just sewn and flatten the seam with you nail.

...soulevez la bande de tissu que vous venez de coudre et aplatissez la couture avec votre ongle.


Turn the block clockwise and place another strip of light colored fabric along the border.

Tournez le block dans le sens des aiguilles d'une montre et positionnez une autre bande de tissu clair le long du bord comme précédemment.


Your thread will be under the strip so go through the two layers of fabric to start your seam in the right-hand corner and sew the same way as the first strip.

Votre fil va se trouver sous la bande précédente donc vous devrez traverser les deux épaisseurs de tissus pour commencer votre couture dans le coin supérieur droit et cousez jusqu'au coin gauche comme pour la bande précédente.


When you have raised and nail-ironed the second light-colored strip, turn your block clockwise and get ready to sew a dark colored strip...

Quand vous aurez cousu et rabattu votre deuxième bande de tissus clair tournez votre block d'un quart de tour et préparez-vous à coudre une bande de tissu foncé...


..starting from under the fabric as before.

...en partant du dessous comme précédemment.


Turn your block again and add a second dark colored strip and you will have finished you first round.

Tournez encore votre block et ajoutez une deuxième bande de tissu foncé et vous aurez fini votre premier tour.


Add another round still going clockwise being careful to use two light colored strips followed by two dark colored strip to get a block that will be dark colored on one half and light colored on the other.

Ajoutez un autre tour en tournant votre block toujours dans le sens des aiguilles d'un montre en faisant bien attention d'utiliser deux bandes de tissus clairs suivies de deux bandes de tissus foncés pour obtenir un block avec une moitié foncée et une autre claire.


Go on this way until you reach the borders of the block and don't worry if your strips are a bit bigger than the block, you can trim the excess off after ironing.

Continuez ainsi jusqu'à atteindre les bords du block. Ne vous inquiétez pas si vos bandes de tissu dépassent du tissus qui sert de support, il sera facile de couper ce qui est en trop une fois le block repassé.


et voilà !

As you can see on the photo my block isn't perfectly symmetrical but it has the right dimensions for the final assembling.
With this technique you can recycle many different fabric that only need to me about the same thickness like worn out shirts or pillowcases !

Now you only need to decide about your final layout and you can find examples here and there. 

Comme vous le voyez sur la photo mon block n'est pas tout a fait symétrique mais cela ne l'empêche pas d'être aux bonnes dimensions pour l'assemblage !
L'avantage de cette technique est que l'on peut recycler tous les tissus qui sont a peu près de même épaisseur y compris les chemises ou les taies d'oreiller usées !

Il ne vous reste plus qu'à partir en promenade sur le web pour décider de votre assemblage final, comme ICI  et  LA


dimanche 10 septembre 2017

Log Cabin Barn Raising


A very soothing and addictive activity....
Une activité relaxante et addictive.....


samedi 2 septembre 2017

samedi 26 août 2017

Stage Global Indigo de Coloretonmonde avec Cécilia Aguirre / Indigo Workshop

En début de semaine, j'ai passé deux jours en région parisienne pour en apprendre plus sur le fameux indigo et savoir le préparer pour teindre sans avoir recours à des produits dangereux.
Ce stage était passionnant et l'ambiance très sympa sous la houlette de Cecile Aguirre qui était très intéressante et prête à répondre à toutes nos questions sans se lasser de répéter.

At the beginning of the week I spent two days near Paris to learn more about indigo and to be able to dye with it without dangerous chemical products.
It was very interesting and very friendly and our teacher Cecile Aguirre was always ready to explain, repeat or answer our questions.


D'abord la plante : la persicaire à indigo (plygonum tinctorium)....
First we discovered the plant : polygonum tinctorium....


...et sa cueillette !
..and how to cut it !  


Comment en extraire la couleur :
How to get the color out of it : 


C'est magique de voir les petits grains bleus au fond de la bassine !
Seeing the little particles of blue at the bottom of the tub is just magical !


Comment filtrer sans en perdre une miette.
How to filter without wasting anything.


Comment conserver la plante en pilant les feuilles....
How to preserve the leaves by crushing them...


... jusqu'à obtenir une pâte homogène  avec laquelle on formera des petites boules à faire sécher au soleil.
...to get a paste that will be shaped in little balls and dried in the sun.


  Une méthode artisanale et amusante qui permet de bien voir le pouvoir colorant de la plante !
A funny and artisanal way to see the dyeing power of the plant !


Nous avons aussi testé le martelage des feuilles entre deux tissus.
We also tried hammering the leaves between two layers of cloth.


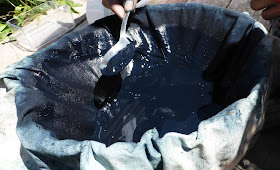
Et surtout le moment tant attendu où nous avons récupéré la pâte bleue pour préparer le bain d'indigo: une recette assez technique et précise où le pH a son importance.
And most important of all, came the moment to scoop the blue paste to prepare the indigo vat : a rather precise and technical recipe where pH really matters.


Notre bain d'indigo avec ses couleurs qui indiquent que tout va bien.
The colors of the vat show that everything goes well.


Ca y est ! On trempe nos échantillons et la couleur arrive avec l'oxydation !
Here it is ! We dip our samples and the color comes out ! 


Nos échantillons qui sèchent. 
The samples drying in the sun.


Une superbe expérience qui va me permettre de me lancer dans le bleu.  
Mes échantillons sont soigneusement rangés et mon cahier est bien rempli !
It was really a super workshop and I'm ready to try dyeing with indigo :
all my samples are sorted out and my copybook is full of useful notes !